Transforming a room with a wood panel accent wall can dramatically enhance its aesthetic appeal and create a focal point that draws the eye. Whether you're aiming for a agrestic, modernistic, or definitive seem, a wood panel accent wall can add warmth, texture, and character to any space. This guide will walk you through the process of create a stunning wood panel accent wall, from planning and material pick to facility and cease touches.
Planning Your Wood Panel Accent Wall
Before plunge into the installation process, it's important to program your project carefully. This includes determining the placement of the accent wall, choose the right type of wood, and gathering the necessary tools and materials.
Choosing the Right Location
Selecting the perfect spot for your wood panel accent wall is the first step. Common choices include:
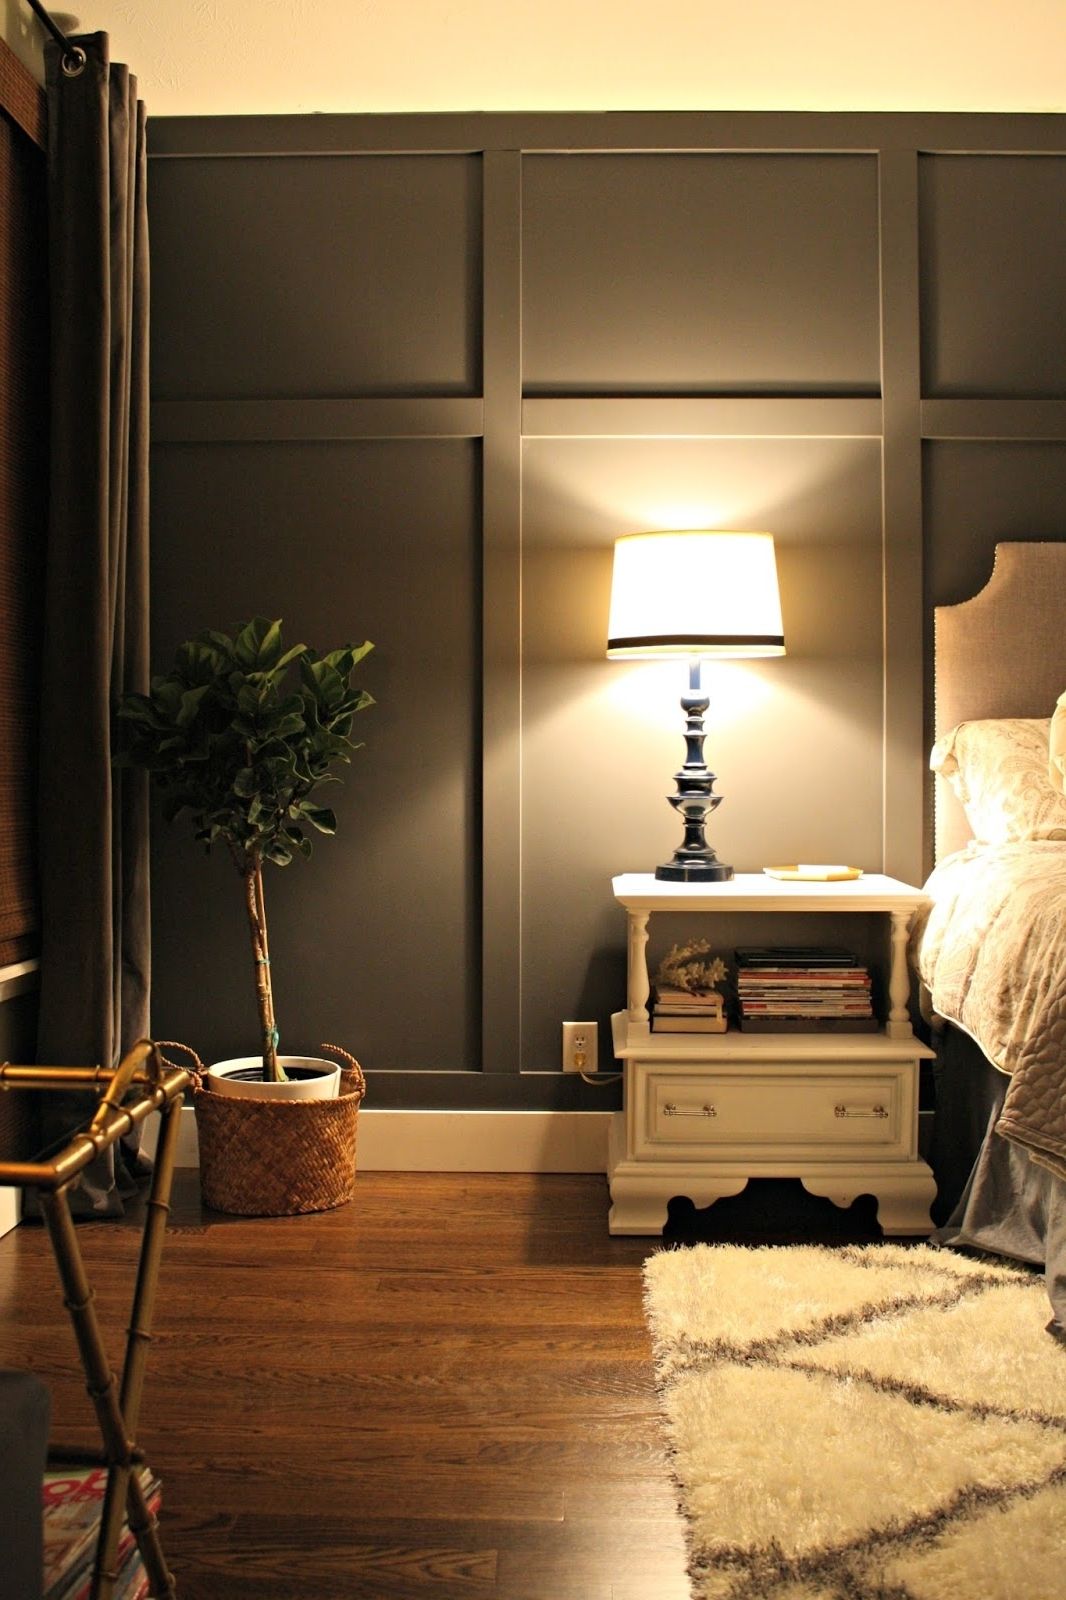
- The wall behind the bed in a bedroom
- The wall behind the sofa in a living room
- The wall in a dine room where the table is grade
- The wall in a home office behind the desk
Consider the overall layout of the room and where you want to draw attention. The accent wall should complement the existing decor and enhance the room's functionality.
Selecting the Type of Wood
There are assorted types of wood you can use for your accent wall, each offer a unique seem and feel. Some democratic options include:
- Pine: Affordable and easy to work with, pine has a light color and a straight grain.
- Oak: Known for its durability and classifiable grain pattern, oak is a authoritative choice.
- Cedar: This wood has a rich, warm coloring and a natural opposition to wet, making it ideal for bathrooms or outdoor spaces.
- Reclaimed Wood: Eco friendly and total of character, rectify wood adds a rustic, vintage touch.
Consider the overall style of your room and the mood you want to make when selecting the type of wood.
Gathering Tools and Materials
To complete your wood panel accent wall task, you'll take the following tools and materials:
- Wood panels or planks
- Measuring tape
- Level
- Circular saw or jigsaw
- Screwdriver or drill
- Screws or nails
- Wood glue
- Sandpaper
- Paint or stain (optional)
- Paintbrushes or rollers (optional)
- Safety gear (gloves, goggles, ear security)
Ensure you have all the necessary items before starting the installation process.
Preparing the Wall
Proper preparation is key to a successful wood panel accent wall installation. This involves cleaning the wall, remove any existing wallpaper or paint, and ensuring the surface is smooth and even.
Cleaning and Prepping the Surface
Begin by cleaning the wall to remove any dirt, dust, or debris. Use a mild detersive and h2o solution, then allow the wall to dry all. If there is any existing wallpaper or paint, remove it cautiously to avoid damaging the wall.
Next, inspect the wall for any imperfections, such as holes or cracks. Fill these with spackling compound and sand the surface smooth once dry. Wipe the wall with a damp cloth to remove any sandpaper dust.
Marking the Layout
Using a measuring tape and level, mark the layout of your wood panels on the wall. Start from the ceiling and work your way down, secure the panels are straight and evenly space. Use a pencil to create light marks that can be easily erased later.
If you're using horizontal panels, mensurate and mark the height of each panel. For vertical panels, quantify and mark the width. Make sure to account for any outlets or switches that may be in the way.
Installing the Wood Panels
With the wall prepare and the layout distinguish, you can start installing the wood panels. Follow these steps for a professional looking finish.
Cutting the Panels
Using a circular saw or jigsaw, cut the wood panels to the desire size based on your measurements. Wear safety gear, include gloves, goggles, and ear security, to protect yourself from debris and noise.
If you're using pre cut panels, you may want to trim them to fit the wall perfectly. Measure carefully and make precise cuts to control a snug fit.
Attaching the Panels
Start at the top of the wall and work your way down, attaching the panels one by one. Use wood glue along the edges of each panel to create a strong bond. Apply pressure to the panels to ensure they adhere properly.
Secure the panels to the wall using screws or nails. Place them at regular intervals to see the panels are firmly attach. Use a degree to ensure the panels are straight and evenly space.
If you're installing horizontal panels, lurch the seams to make a more visually invoke pattern. For vertical panels, ensure the seams are array to create a clean, uniform seem.
Finishing Touches
Once all the panels are installed, it's time to add the finishing touches. This may include sand the panels to remove any rough edges, utilize paint or stain, and seal the wood to protect it from wet and wear.
Use fine grit sandpaper to smooth the panels, then wipe away any dust with a damp cloth. Apply paint or stain using a brush or roller, following the manufacturer's instructions. Allow the finish to dry completely before applying a sealant.
For a more agrestic look, you can leave the wood panels natural and simply seal them with a clear coat. This will enhance the natural beauty of the wood while protecting it from damage.
Note: Always wear a mask when sanding to avoid inhaling dust particles.
Styling Your Wood Panel Accent Wall
After dispatch the installation, it's time to style your wood panel accent wall to complement your room's decor. Here are some ideas to assist you get the most of your new characteristic wall.
Adding Artwork and Decor
Hang artwork, photographs, or ornamental mirrors on the accent wall to add visual interest. Choose pieces that complement the wood's natural beauty and enhance the room's overall aesthetical.
Consider using float shelves to display books, plants, or other ornamental items. This not only adds functionality but also creates a layer look that draws the eye.
Lighting Options
Proper perch can spotlight the texture and grain of the wood panels, making them stand out even more. Consider the following illuminate options:
- Wall sconces: Install sconces on either side of the accent wall to create a soft, ambient glow.
- Picture lights: Use picture lights to illuminate artwork or photographs hung on the wall.
- String lights: Add draw lights for a cozy, inviting atmosphere, especially in bedrooms or go rooms.
Choose lighting fixtures that complement the style of your room and the wood panels.
Furniture Placement
Arrange your furniture to highlight the accent wall. for representative, place your bed against the accent wall in a bedroom or position your sofa in front of it in a living room. This will draw attention to the wall and create a focal point in the room.
Consider the flow of the room and ensure that the furniture placement is both functional and esthetically pleasing.
Maintaining Your Wood Panel Accent Wall
To keep your wood panel accent wall look its best, regular maintenance is all-important. Here are some tips to facilitate you care for your accent wall:
Cleaning
Dust the wood panels regularly using a soft cloth or duster. For deeper cleaning, use a mild soap and h2o answer, then wipe the panels dry with a clean cloth. Avoid using harsh chemicals or abrasive cleaners that can damage the wood.
Protecting from Moisture
Wood is susceptible to wet damage, so it's important to protect your accent wall from h2o and humidity. Avoid placing the accent wall in areas prone to wet, such as bathrooms or kitchens, unless you've used a wet resistant wood like cedar.
If you live in a humid climate, deal using a dehumidifier to keep optimum humidity levels in your home.
Repairing Damage
Over time, your wood panel accent wall may sustain child damage, such as scratches or dents. To repair these issues, follow these steps:
- Sand the damage region gently with fine grit sandpaper.
- Apply wood filler to the damaged country and countenance it to dry.
- Sand the country smooth and wipe away any dust.
- Touch up the area with paint or stain to match the environ wood.
For more important damage, you may ask to supercede the affected panel. Measure and cut a new panel to fit the space, then attach it using wood glue and screws or nails.
Note: Always test a little, hidden area first when using new pick products or repair techniques to guarantee they do not damage the wood.
to summarise, creating a wood panel accent wall can transubstantiate any room into a stylish and inviting space. By carefully plan your projection, select the right materials, and following proper installation techniques, you can achieve a beautiful and lasting accent wall that enhances your home s aesthetic appeal. Regular maintenance and thoughtful styling will insure that your wood panel accent wall remains a focal point in your room for years to come.
Related Terms:
- wooden plank accent wall
- countrified wood accent wall ideas
- ornamental wood wall designs
- modern wood accent wall designs
- faux wood wall paneling
- faux wood panels for walls